Body Casting. Part 1

My beautiful friend was sadly diagnosed with breast cancer at the end of last year.

After triumphantly taking on chemotherapy and with surgery looming we discussed taking a cast!

We had planned doing it slowly, but a rapid surgery date meant action stations!

I had done lots of research on body casts and while you can take wonderful casts with alginate type casting powders, you can not make a clay cast from them.

I bulk ordered fine plaster of Paris and we got to work!

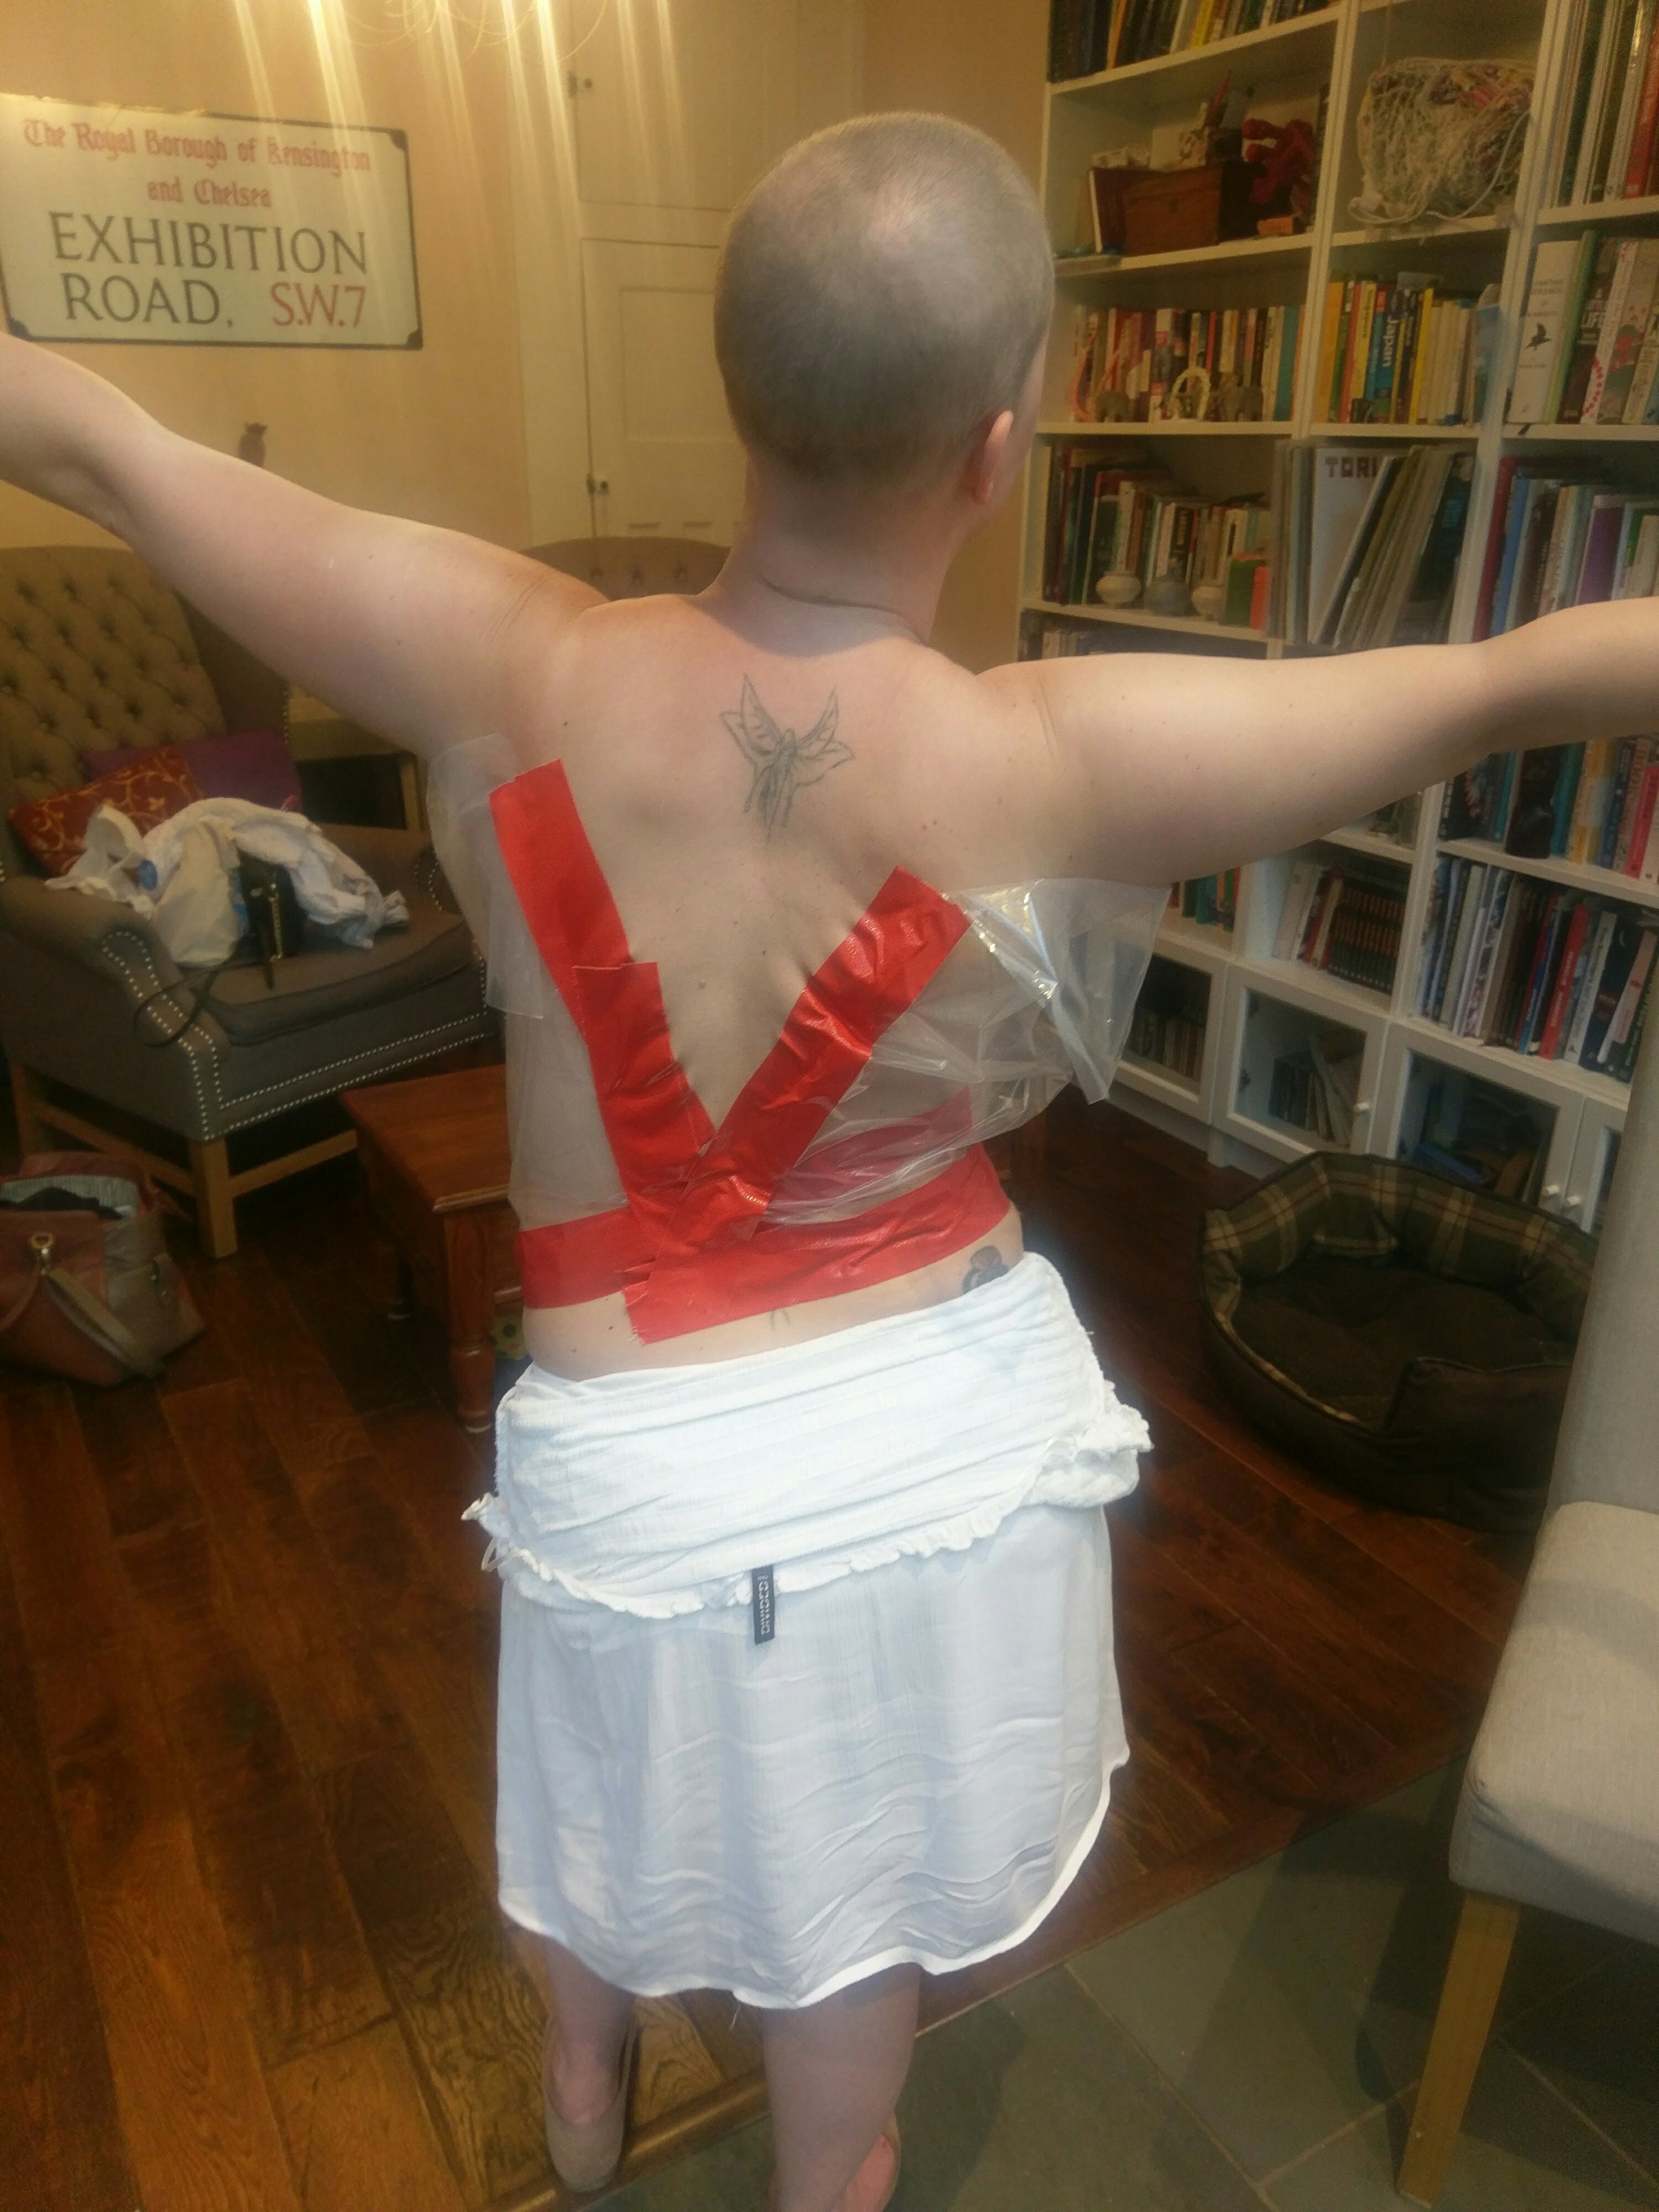
Now the difficulty we faced is that taking a cast of two breasts is harder than one! I have seen examples were you can, essentially, strap a halved flower pot to one breast and fill that plaster. I didn’t have a flower pot big enough!

So I opted for heavy duty nylon bags and lots of duct tape. We made a pocket so that she could stand up to get the most natural looking cast possible.

Then we went to the garden (good idea) and I started to make batches of plaster and slowly filled up the pocket with plaster… the plastic pocket sprung a leak (bad idea).

We tried wrapping more tape around to seal the leak and this helped a little. Also I completely underestimated exactly how much plaster you need (lots), so it was a race against time to make another batch.

Happily, by this time the first batch of plaster had started to set which helped with the leak!

A downside of lots of plaster is that it becomes very heavy so we had to support the weight whilst also not squashing the cast!

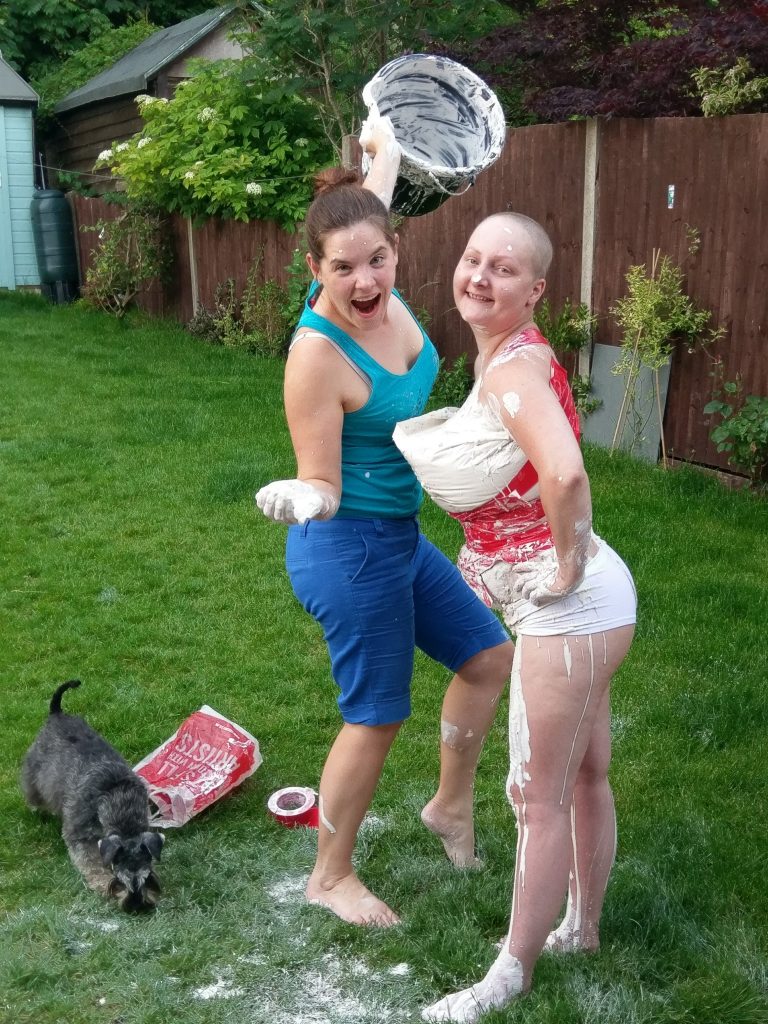
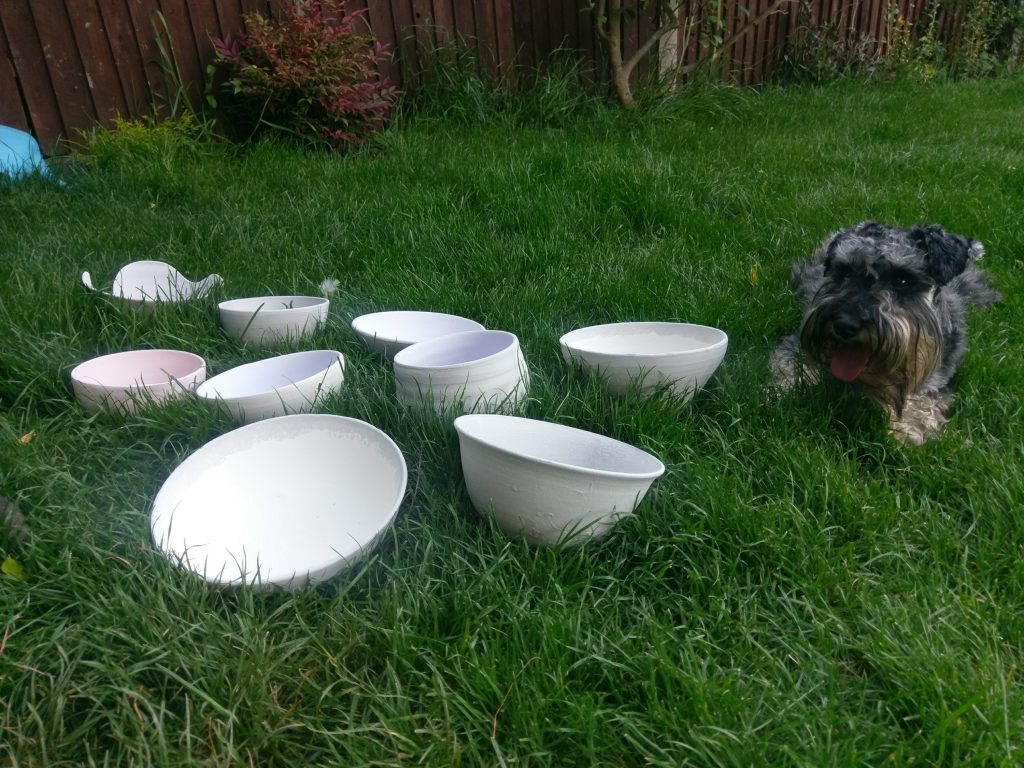
It was a messy business! (Dog was very helpful in this task obviously!)

Once the plaster had hardened a little my friend needed a little lie down…

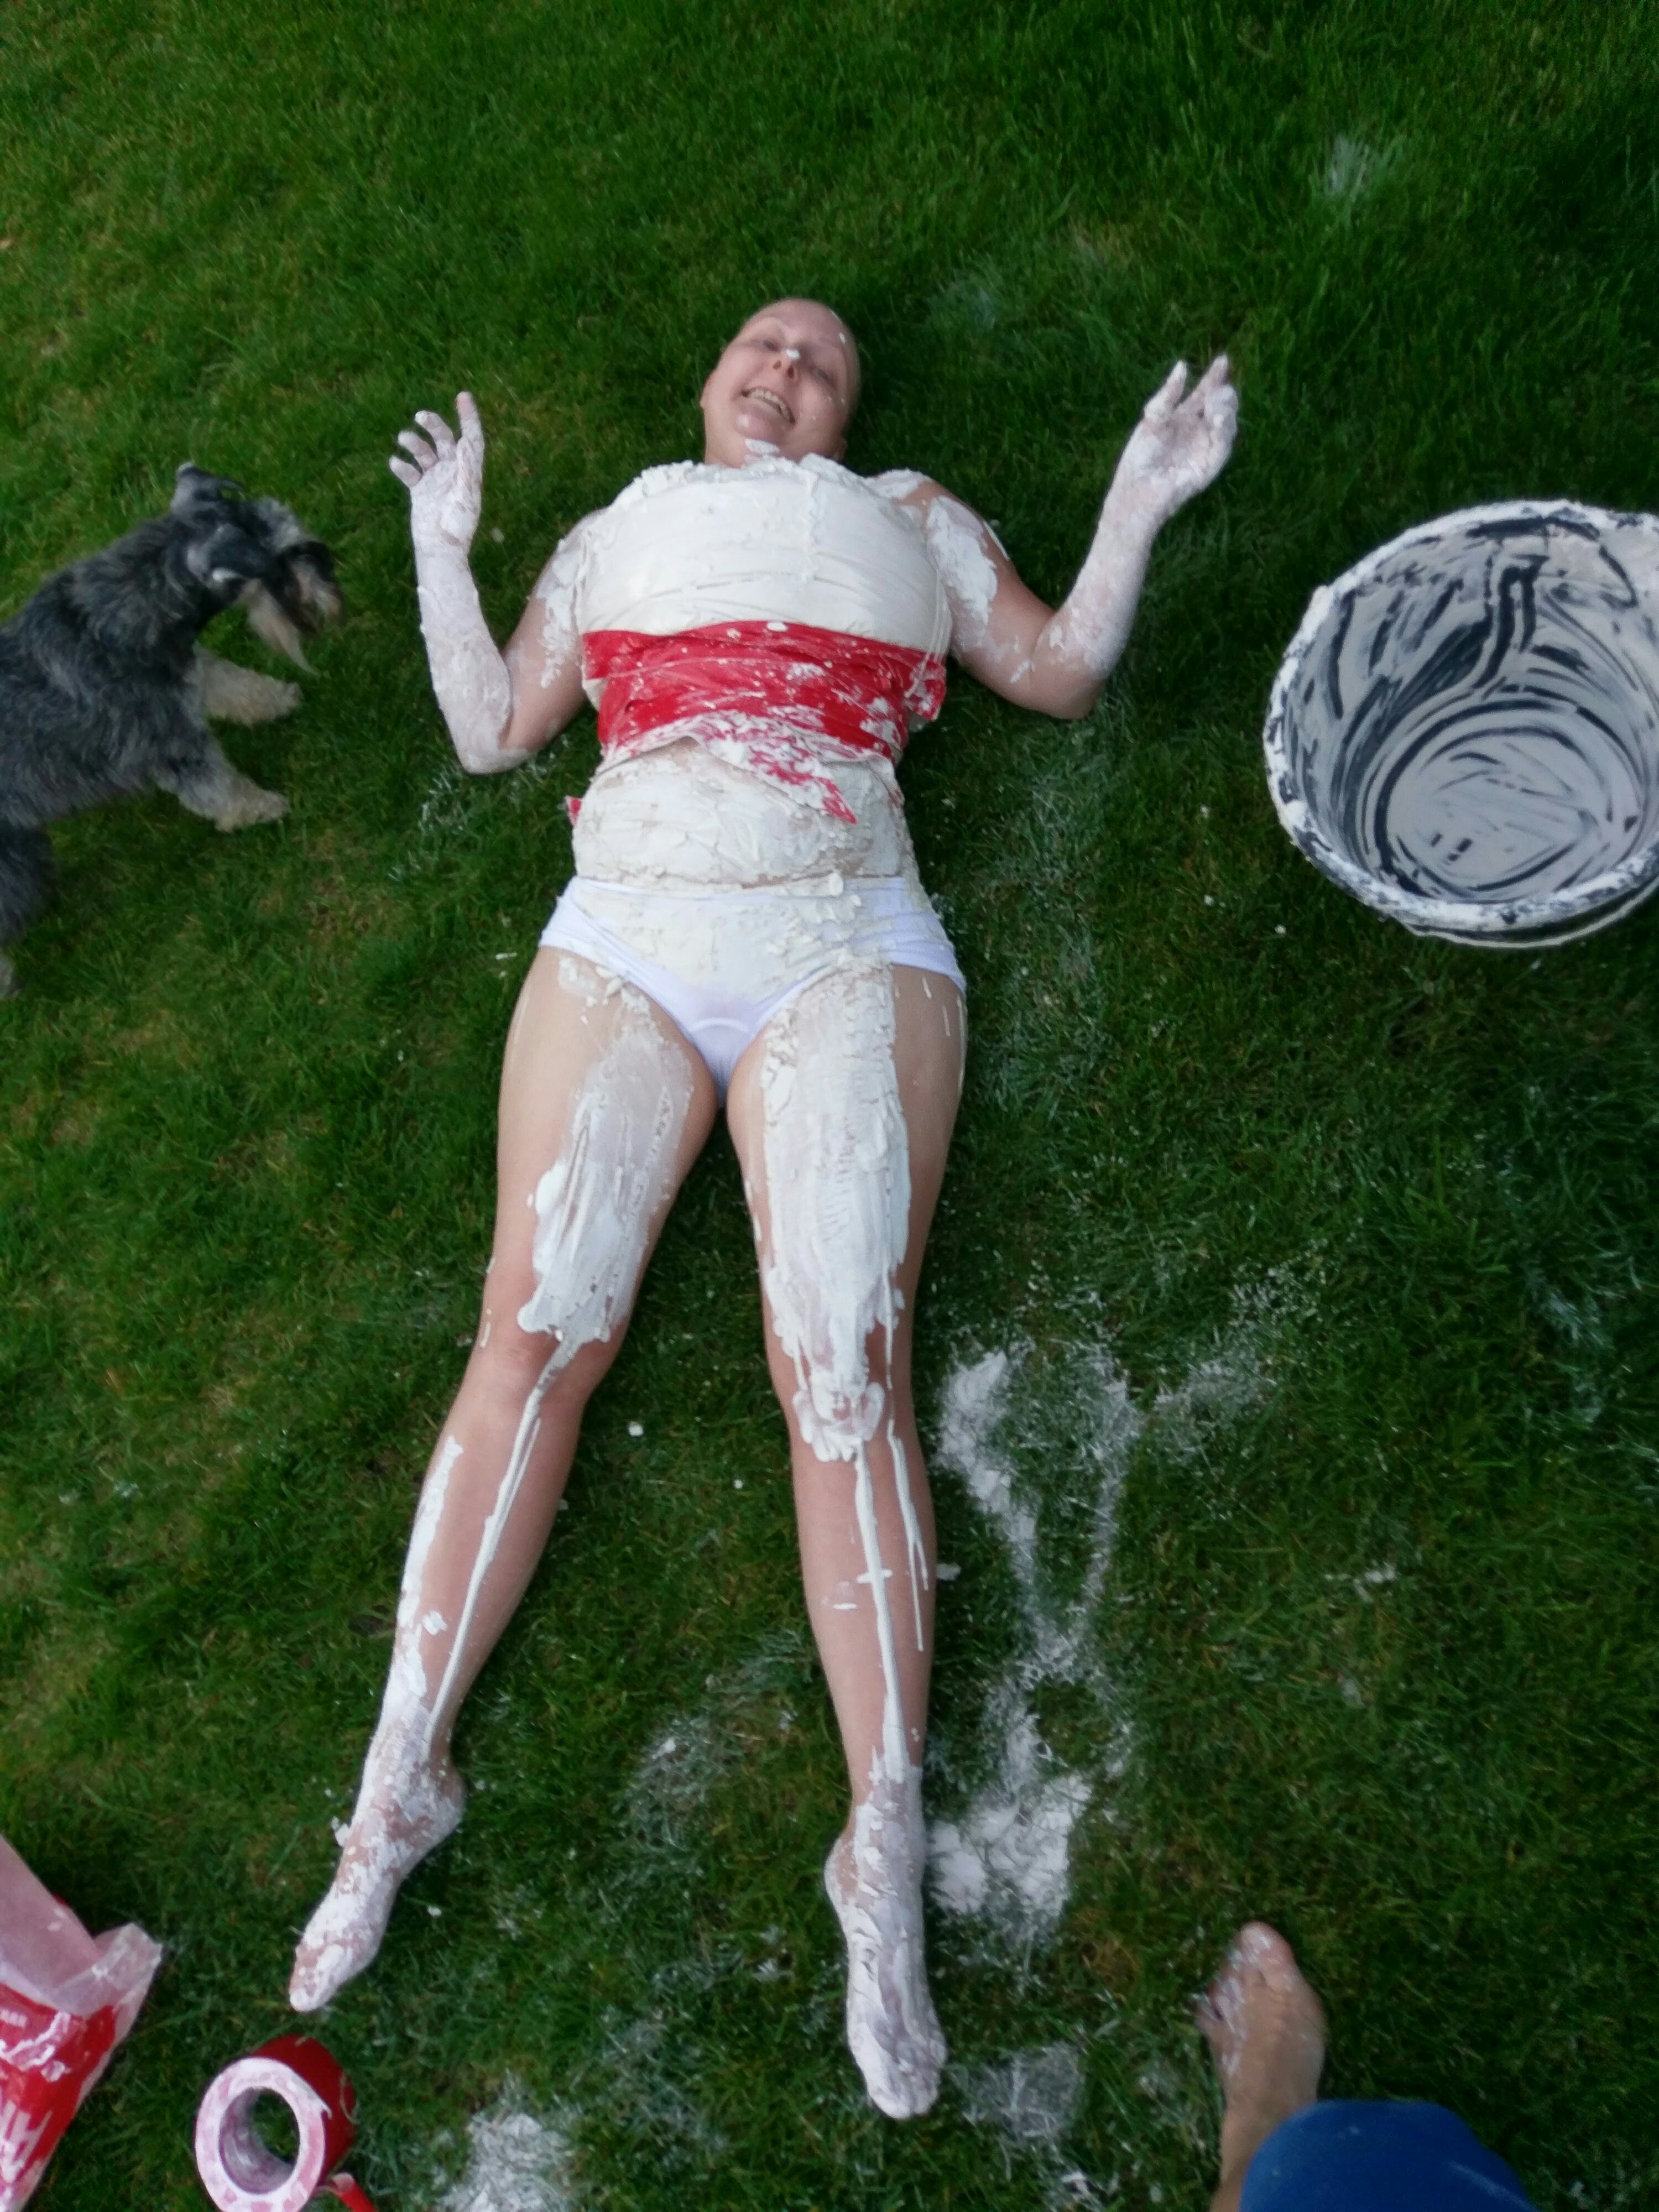
It turns out plaster is hard to get out of grass, so I would recommend that you pop a sheet on the floor if you try this at home!

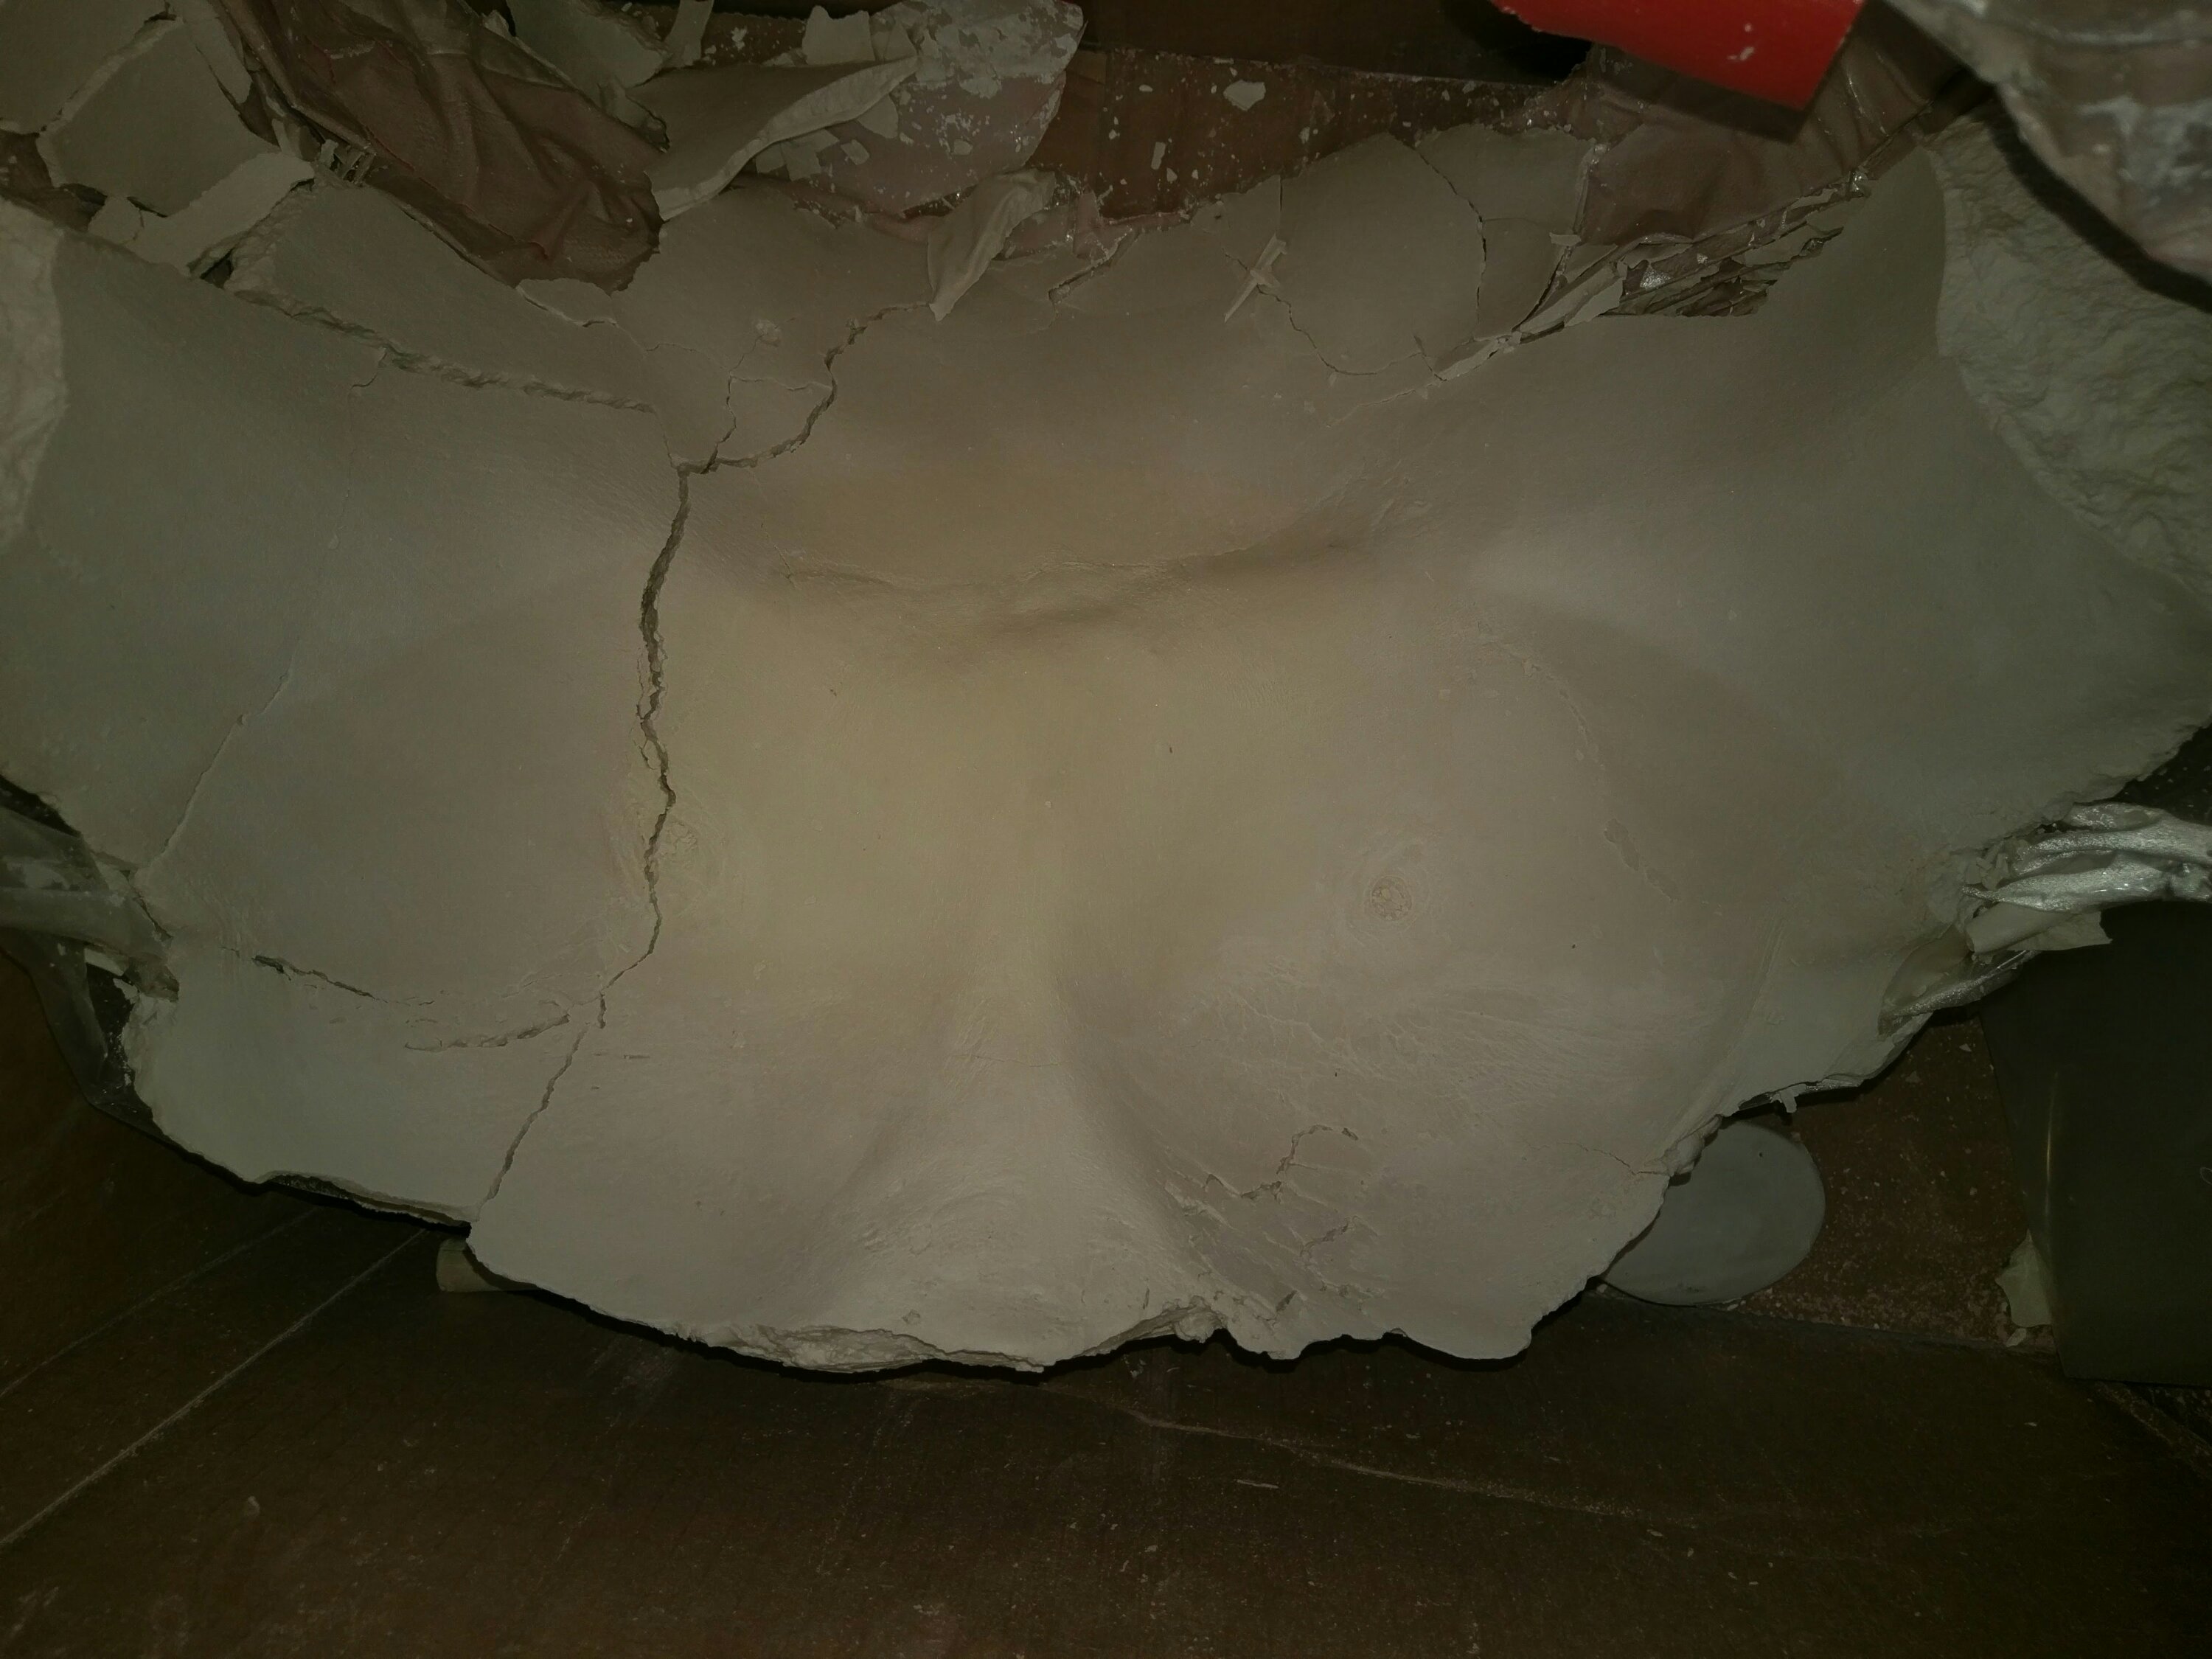
Plaster is exothermic (gives out heat) as it sets and it is important to remove it from skin contact before it gets too hot. I cut the mould from my friend’s body and carefully removed the mould….

Success!

A Kiln and First Firing!

For the past year I’ve been (very) slowly making and finishing a big stash of pots ready for the big first fire!

Enter a big old wobbly pile of ceramics, some of which have met their doom whilst waiting to join the fun.

But first enter the kiln!…

After much research and a balance between space, electical requirements and overall space I have opted for a lovely electric Rohde Kiln, with an internal capacity of 118L and a current requirement of 39A.

Rhonda unpacked…

She fits… Just!

After carefully following the instructions, and setting RHonda off on a “blind bake” and re-tightening her bands it was time to get cracking.

Packing the Rhonda for the first time was certainly enlightening!  I used a batt wash on the kiln shelves which is simply superb for any glaze-sticky situations! 🙂

Hound approves of Rhonda’s first wares!

Reorganising

For a long time the only goddies in my shed were a lovely wheel and other tools and a few glaze buckets. I should also point out that the shed is not yet electricfied so extenstion cables have bene the norm. But in April things changed as I fianlly took the plunge and took my lovely parents on their kind offer to treat me to a birthdays and Christmas kiln!

The shed and wheel have been up and running just pootling along for sometime and as a result, I have had time to build up a good supply of greenware. Time to get drastic on the storage to make space!

Huzzah for shelving – popping it all up high has cleared out lots of space! 🙂

Now to electricfy the shed!


Sheds!

We have a small garden and small gardnes tend to mean small sheds, and we are no exception!

Even more so, when you are sharing half the shed with your husband’s dark room! So Enter the shed of Potted Peas…

Our joint shed (with concrete base and heavy duty-soon-to-be-kiln-supporting floor) is 10′ by 8′, which really means the Potted Peas shed is a tiny 5′ by 8′!

I am by no means the most tidy person in the world, but my aim is to see if it is possible to have it all in a pocket sized shed!

Time to fill it up the shed with goodies!